How to Pass the Prop Firm Challenge in 2026 (Complete Guide, 90%+ Method)
Last updated: April 20, 2026, 16 min read
TL;DR, Passing a Prop Firm challenge in 2026 is not luck, it's math and discipline. Less than 10% of traders pass on the first attempt. Those who pass follow 4 pillars: risk management below 1% per trade, daily consistency, suitability for the right market, and emotional control. This guide breaks down the process: how to calculate the position size that survives Drawdown, how to divide the evaluation into phases (recognition → execution → protection), which hidden rules cause traders to fail by firm, what account size to start with, and the daily routine of those who pass. In the end, you will have a concrete, not motivational, plan.
| Approval Numbers (2026) | |
|---|---|
| 1st Attempt Pass Rate | Between 5% and 12% |
| Failure Cause #1 | Excessive Position Size |
| Cause #2 | Consistency Rule Violation |
| Cause #3 | Trading Macro News Without Permission |
| Average Time to Pass | 10 to 20 Effective Days |
| Recommended Risk per Trade | 0.5% to 1% of Balance |
| Average Number of Attempts | 2 to 3 Until First Yes |
| Average Cost per Approval | $60 to $200 with coupon |
The Naked Truth: Why 90% Fail
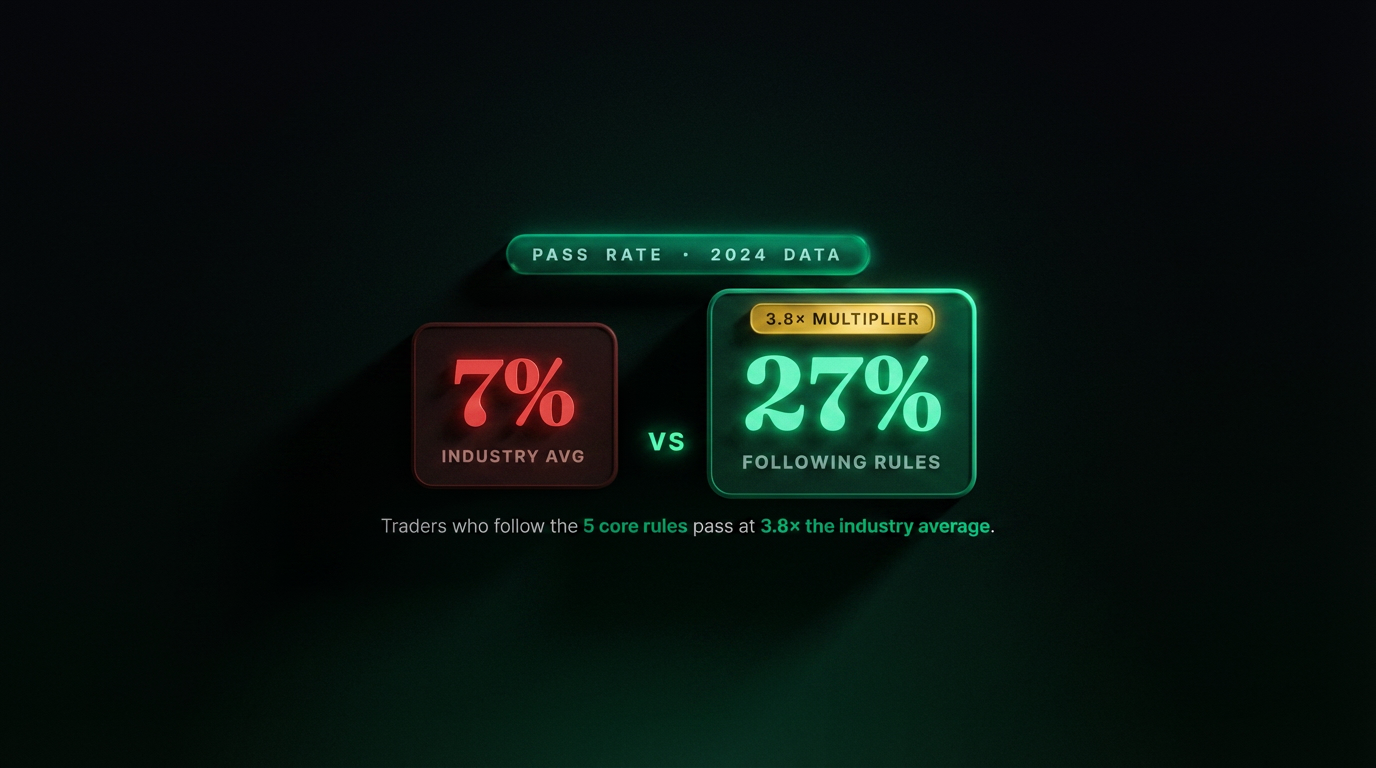
Any honest conversation about passing a Prop Firm challenge begins by accepting an uncomfortable statistic: between 88% and 95% of traders fail on their first attempt. This number comes from aggregated data published by communities like Prop Reviews, MyFxBook, and annual reports from FTMO itself, the only large firm that discloses audited approval numbers.
The reason is not a lack of capital or technical ability in most cases. It's a mismatch between what the trader believes they need to do ("hit the target") and what the firm is measuring ("can you survive 20 market days without destroying yourself?"). While the trader thinks about profit, the firm is looking at three things: Drawdown, consistency, and behavior on adverse days.
What the data hides is more interesting: of the 90% who fail, about 60% fail in the first 5 days due to excessive position size. Another 20% fail between day 6 and 15 by ignoring the Consistency Rule. The 10% remaining get close to the target and break in the last few days due to anxiety, increasing size precisely when they should be reducing it.
If you read the rest of this guide and do one thing differently, reduce your trade size to 0.5% of your balance, you will already eliminate the main cause of failure. Everything else is refinement.
The Math of the Target: Understanding the Parameters
Before pressing any button, you need to understand the three numbers that define your challenge. They are what decide if the game is viable or if you've already started losing.
Profit Target: What the Firm Asks For
The profit target varies from 6% to 10% of the initial balance, depending on the firm and model.
- 1-step (Apex, Bulenox, TakeProfitTrader): 6% to 8% single target
- 2-step (FTMO, FundedNext, The5%ers): 8%–10% in phase 1 + 5% in phase 2
- Instant funding (Bulenox instant, FundedNext Stellar): no evaluation phase, only Drawdown rules
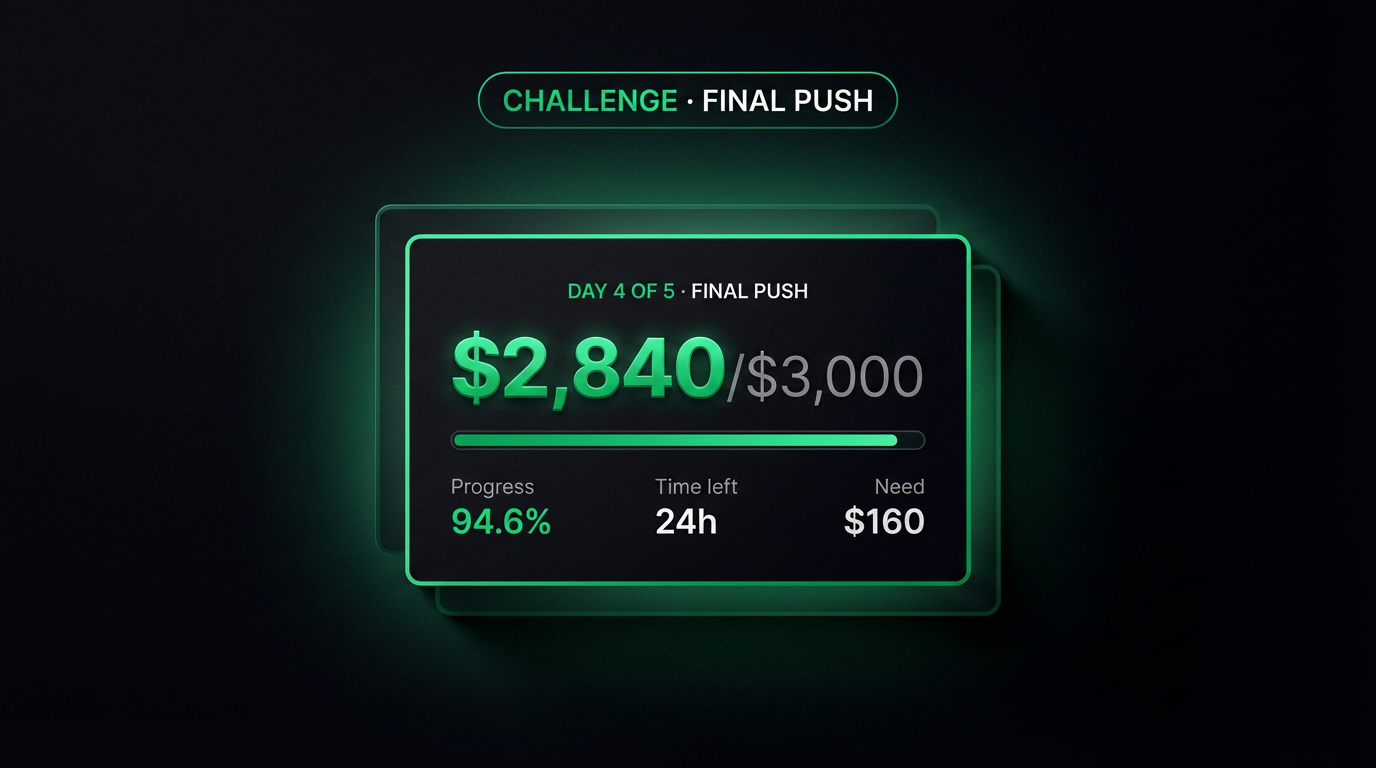
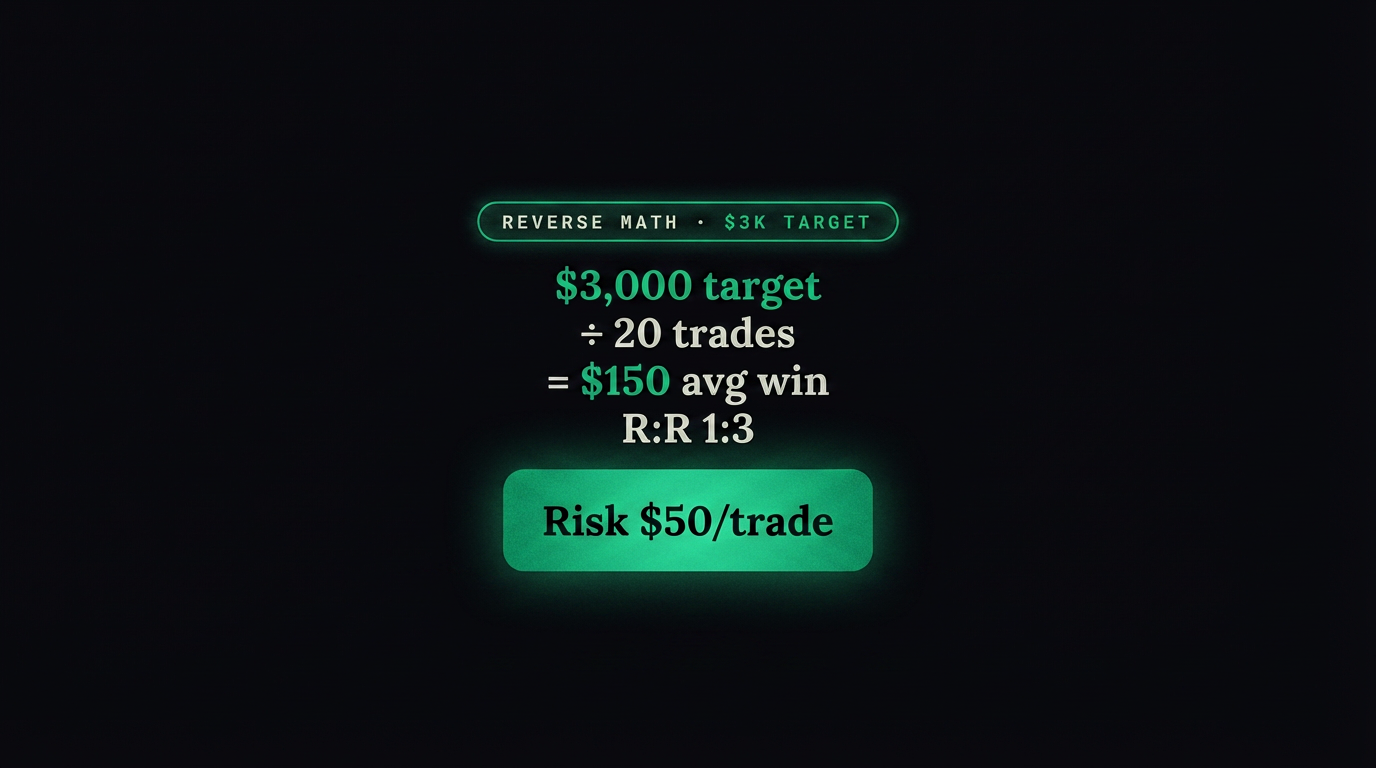
In concrete numbers: on an Apex 50K account, the target is $3,000 (6%). On an FTMO 100K Challenge, phase 1 asks for $10,000 (10%), phase 2 asks for $5,000 (5%).
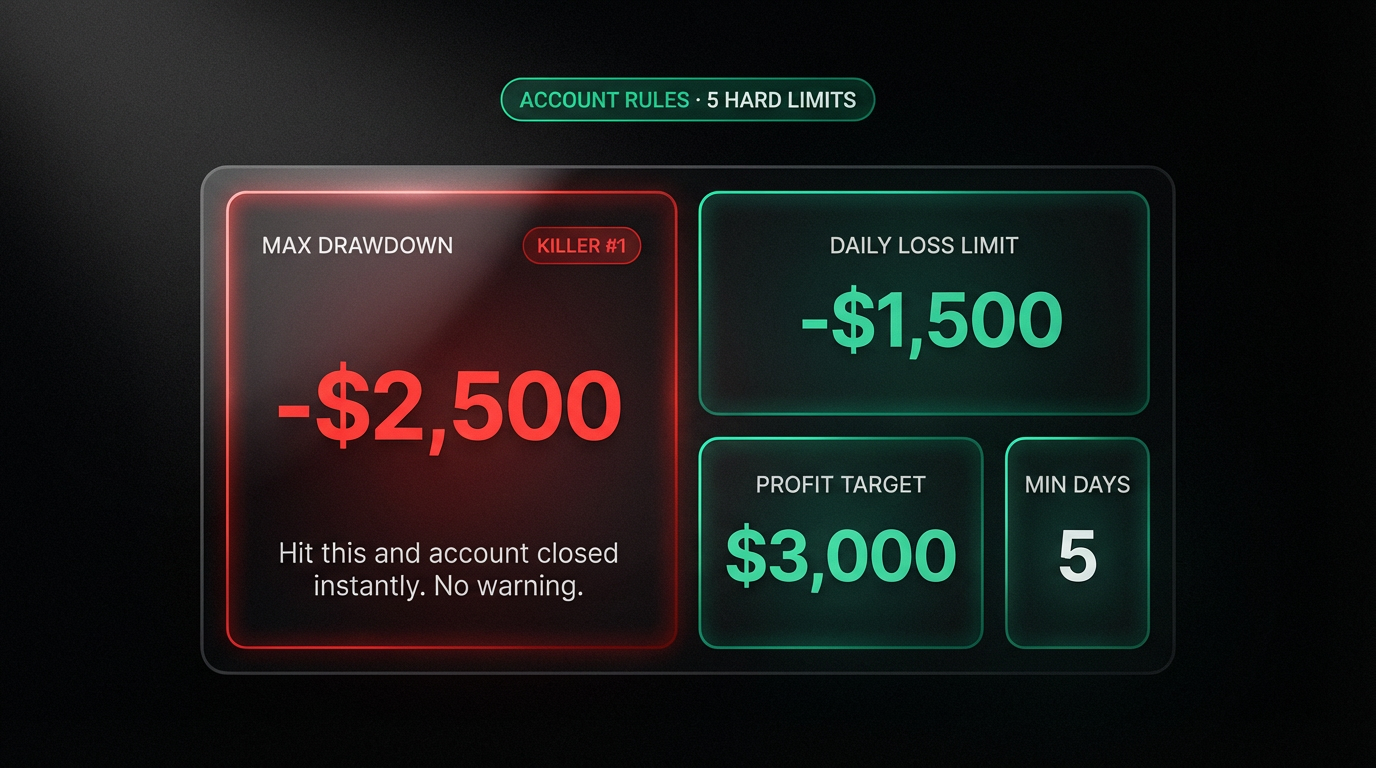
Drawdown: The Wall That Knocks You Down
The Drawdown is the accumulated loss limit that, if violated, ends the challenge. There are three main models:
- Trailing Drawdown, the limit "moves up" with your balance. If you reach $52,500 on an Apex 50K with a trailing of $2,500, your absolute limit remains at $50,000. Losing from the top = account closed.
- Static / End-of-Day Drawdown, the limit is fixed or calculated at the close of each day. Less cruel, more predictable.
- Daily Loss Limit, loss ceiling in a single day (e.g., -$1,500 in 24h). Violation = account closed even if the accumulated balance is positive.
The Drawdown Management guide details each type and how each one can cause you to fail in different situations.
Min Trading Days: The Minimum Time
Most firms require a minimum number of trading days, Apex asks for 1, FTMO asks for 4 per phase, FundingPips asks for 3. It seems low, but in practice, those who pass in a number of days close to the minimum almost always violate the Consistency Rule.
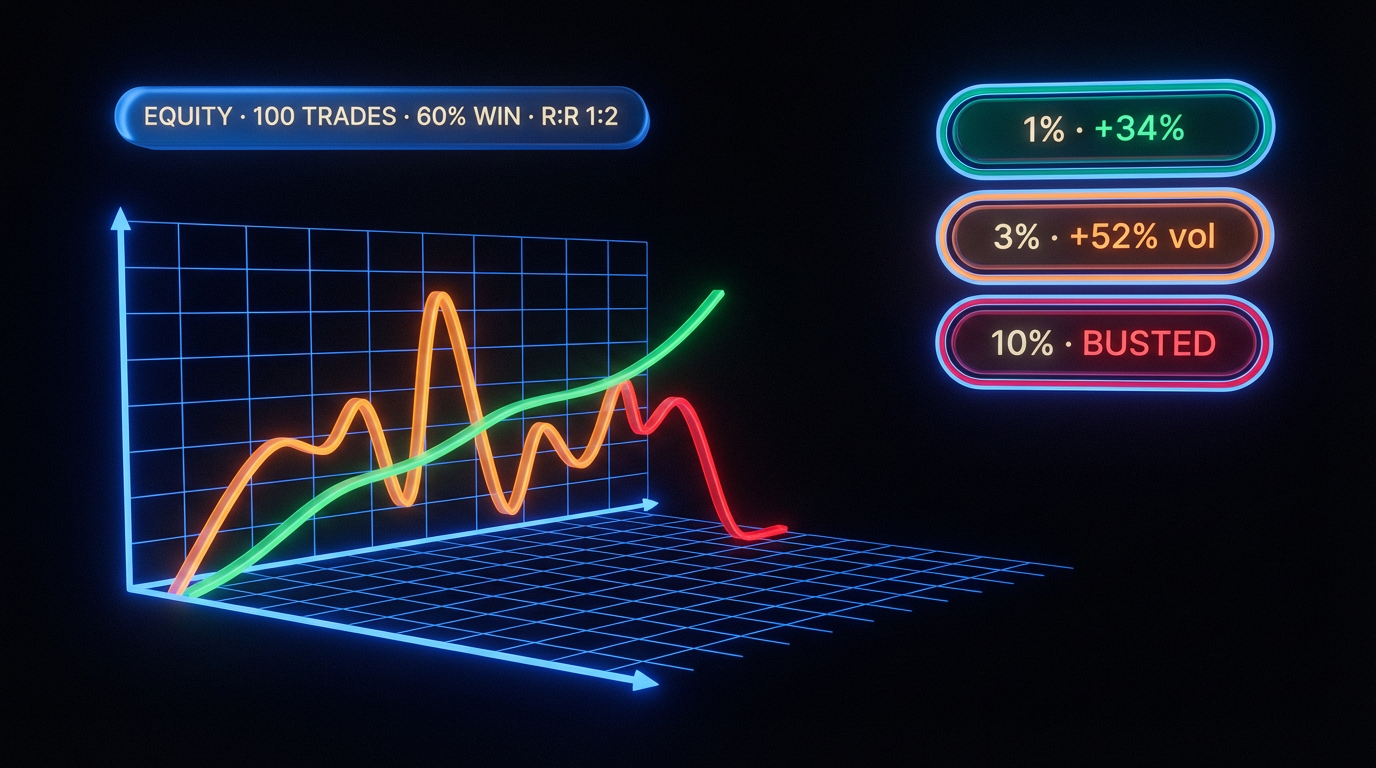
Practical Calculation: Apex 50K, 6% target, Trailing Drawdown of $2,500. If you risk 1% per trade ($500) and have a 55% win rate with a 1:1.5 risk-reward ratio, your expected value per trade is +$62.50. To reach the $3,000 target, you need approximately 48 trades with this performance. At a pace of 4 trades per day, that's 12 business days. This is the sustainable pace. Trying to do it in 3 days with 10% risk per trade is suicidal math.
The 4 Pillars to Pass
Traders who consistently pass multiple firms converge on four principles. They are not new and not magical, but almost no one applies all four at the same time.
Pillar 1: Risk Management Below 1%
Maximum risk per trade between 0.5% and 1% of the balance. On a $50,000 account, this is $250 to $500 per trade. This number is not conservative, it's what allows you to survive a sequence of 4 to 6 consecutive losses without hitting the Daily Loss limit, which statistically happens in 100% of evaluation cycles.
To calculate contract size:
- Futures (ES): if I risk $250 and my stop loss is 5 points away, I trade 4 MES (micro) contracts or 0.8 ES contracts (i.e., 4 MES). Never 1 full ES in this scenario.
- Forex (EURUSD): $500 risk with 20 pips distance = 2.5 mini lots (0.25 standard lot). A position calculator is mandatory.
Pillar 2: Daily Consistency
Objective: have similar profit days, without peaks. The Consistency Rule of most firms requires that the largest profitable day represents a maximum of 30% to 50% of the total profit. If you earn $2,500 in a single day in a challenge with a $3,000 target, you are stuck, you need to continue trading until the aggregate dilutes that day.
Practical rule: establish a daily profit target (e.g., 1% of balance = $500 on a 50K account) and a daily loss limit (e.g., 1.5% = $750). When either is hit, close the platform. This is the discipline that separates those who pass from those who don't.
Pillar 3: Suitability for the Right Market
Trade the asset you understand. If your thesis is in Futures (ES, NQ, GC, CL), it makes no sense to open a Forex challenge. If you've never traded gold, don't start the challenge with GC. Each asset has a different pace, intraday volatility, and liquid hours. The challenge is not the time to learn a new asset.
Pillar 4: Emotional Control and Routine
The most underestimated pillar. Have a pre-session ritual (check macro calendar, review previous day's context), trade only during liquid windows, and close the platform when the daily target is hit. In a challenge, boredom is profit.
How to Calculate the Position Size That Protects You
The formula that offers the most protection against failure is simple, yet it is ignored by most traders. Here is the complete method.
Step 1: Define Your Risk per Trade
Use 0.5% of the initial balance. On a 50K account, that's $250. Why 0.5% and not 1%? Because the Trailing Drawdown is aggressive: a sequence of 5 consecutive losses at 1% = -5%, and in many firms, this already hits the limit. With 0.5%, the same sequence takes you to -2.5%, with room to recover.
Step 2: Calculate the Distance to the Stop Loss Limit
Before entering, you define where the stop loss limit for that trade is. In Futures, it can be 5 points on ES, 10 points on NQ, $5 on GC. In Forex, it can be 15–20 pips on EURUSD, 30 pips on GBPJPY.
Step 3: Divide Risk by Distance
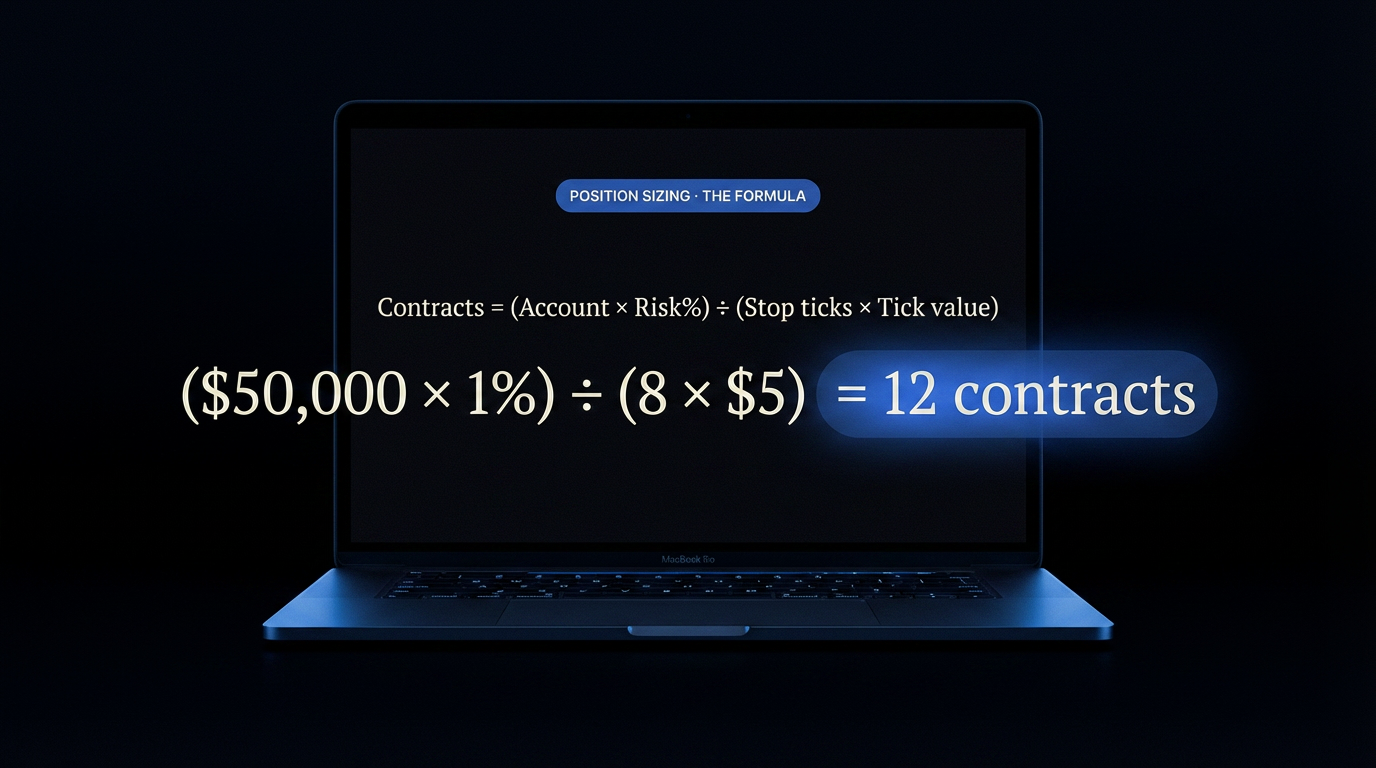
Number of contracts = Risk in dollars ÷ (Distance × Tick Value × Multiplier).
- Example ES: $250 ÷ (5 points × $12.50 × 4 ticks/point) = $250 ÷ $250 = 1 ES contract
- Example MES (micro): same scenario = $250 ÷ $25 = 10 MES contracts (same risk, more fractional execution)
- Example EURUSD: $500 risk ÷ (20 pips × $10/pip per lot) = 2.5 mini lots (0.25 standard lot)
Step 4: Never Round Up
If the calculation yields 1.8 contracts, you trade 1. Rounding up seems minor, but over 30 trades, it's what separates those who pass from those who don't.
Golden Rule: "Position yourself to survive, not to hit the target." Those who position to survive finish the challenge above the target without realizing it. Those who position to hit the target end up buying a reset.
The Psychological Trap: Speed vs. Survival
The biggest illusion for those starting a challenge is that "passing quickly = passing better." It's not. Passing quickly is statistically worse for three reasons.
First, the target has a minimum time frame (1 to 5 days) and a maximum (usually 30 days, sometimes unlimited). Passing in 2 days means you've broken some consistency rule, 9 out of 10 times, the Consistency Rule blocks your payout later.
Second, the market has cycles. Forcing results on a sideways day is like trying to run on a stationary treadmill, you burn energy without getting anywhere. Waiting for the right day (a day with a clear trend, identifiable reversal, resolved news) yields much more in 1 well-chosen day than in 5 days of trying.
Third, speed forces size. To hit 6% in 3 days, you need to capture 2% per day. With a risk of 0.5% per trade, this requires 4 consecutive winning trades on perfect setups, and that doesn't exist in a replicable way.
The trader who passes in 15 days with discipline has something that the trader who passes in 3 days by luck does not: a system that can be repeated in funded. And it's in funded accounts that you make real money.
Evaluation Cycle: How to Divide the Challenge Weeks
Thinking of the challenge as a 3-phase journey measurably increases the pass rate.
Phase 1: Recognition (Days 1 to 4)
Trade minimum size. Half of what you would calculate. Objective: understand platform execution, latency, how Drawdown moves in real-time, how fills happen. Profit goal for this phase: 1% of balance (not 6%). If you finish this phase with a small profit or neutral, mission accomplished.
Phase 2: Execution (Days 5 to 15)
Now you are calibrated. Trade the size calculated in Pillar 1. Objective: accumulate 3% to 5% profit. Trade only during your market's liquid windows. Maximum 4 trades/day. Zero trades outside the plan.
Phase 3: Protection (Days 15+)
If you've reached this point with 4%+ profit on an Apex 50K (accumulated $2,000+), you are in the final stretch. Reduce your size by half. The goal now is not to "hit the target quickly", it's to not give back profit. The Trailing Drawdown is right below you. A single poorly sized trade can undo 10 days of work.
The Hidden Rules That Cause Traders to Fail
Rules are not the same across firms. Ignoring one of them can end the challenge without you even realizing you violated something.
Consistency Rule
Your largest profitable day cannot represent more than a percentage of the total profit. Typical values:
- Apex: 30% (the largest day cannot be 30%+ of the total)
- Bulenox: 30%
- FundingPips Pro: 50%
- TakeProfitTrader: no formal rule, but funded accounts have consistency checks
The rule applies both in the challenge and in funded accounts. Violation does not close the account, but it blocks the payout until you trade enough to dilute the peak.
News trading (macro)
Some firms prohibit trading within 2 minutes before to 2 minutes after high-impact events (NFP, CPI, FOMC). Check the firm's calendar beforehand:
- FTMO: prohibited during high-impact events in the challenge, allowed in funded accounts
- Apex: allowed
- Bulenox: allowed
- FundingPips: prohibited during high impact
Max lot / Maximum Position
Each firm has an absolute ceiling per trade, even if your risk calculation allows more. Apex 50K: 10 ES contracts. FTMO 100K: 10 mini lots per pair. Exceeding this ceiling immediately closes the account.
Weekend holding
Several Forex firms prohibit holding open positions over the weekend (Apex and Bulenox in Futures automatically close them on Friday). Check before opening a position late Friday afternoon.
Copy Trading and Latency Arbitrage
Prohibited in virtually all firms. Trading the same strategy on 2 accounts simultaneously = ban. Exception: some firms allow it if you have multiple accounts with the same firm and notify them in advance.
Choosing the Right Account Size
Account size impacts three things: challenge cost, contract size you will trade, and potential monthly payout. The math of which to choose depends on your goal.
| Account | Cost with coupon (Apex) | Target (6%) | Target Monthly Payout (4%) | Ideal for |
|---|---|---|---|---|
| 25K | $19.90 | $1,500 | $1,000 | Learning mechanics, losing cheaply |
| 50K | $24.90 | $3,000 | $2,000 | Sweet spot between cost and return |
| 100K | $39.90 | $6,000 | $4,000 | Experienced trader scaling up |
| 150K | $59.90 | $9,000 | $6,000 | Already passed smaller accounts, wants to leverage |
Standard recommendation: start with 25K or 50K. The cost is low enough for 3–4 attempts to fit within $100. The rules are identical to larger accounts, so you learn the real game. After the first payout, scaling to 100K makes mathematical sense: the cost increases by 60% but the target payout doubles.
A rule almost no one follows: do not open a 100K account without first passing a 25K or 50K account. The mental risk jump between 25K and 100K is what causes most traders who skip steps to fail. Seeing a $5,000 Drawdown 10 points away on a 100K account causes a different kind of paralysis than seeing $1,500 on a 25K account.
Daily Routine of the Trader Who Passes
Approved traders converge on a 3-block routine. It's not glamorous, but it works.
Pre-session (45 minutes before open)
- Check the day's economic calendar, high-impact events, times
- Review the previous day's context: close, key levels touched, dominant setup
- Mark decision zones on the chart (previous day's high, session open, VWAP)
- Define the day's target (1% of balance) and loss limit (1.5%)
- Decide: is it a day to trade or observe? Some days the answer is to observe
Session (liquid window, 2–4 hours)
- Trade only setups from your written plan
- Maximum 4 trades, if the limit is reached, close
- No exception to the calculated size. If the calculation yields 1 contract, it's 1 contract. Not 2
- If the daily target is hit, close and do something else. Profit is locked in by exiting the market
- If the loss limit is hit, close and don't look at the chart again until the next day
Post-session (15 minutes)
- Note each trade: setup, size, result, execution (not the analysis, the execution)
- Evaluate: did I respect the plan? Where did I deviate? If I didn't deviate and lost, the market is the market
- Check the balance, current Drawdown, distance to Trailing
- Close the platform. Don't keep analyzing the chart after hours
When to Give Up and Reset vs. When to Hold On
At some point in the challenge, every trader faces the decision: reset or hold on? The answer depends on the distance to the Drawdown.
- If you are less than 1% from the maximum Trailing Drawdown: stop trading. Trade demo for 2 days. Come back with half the size. Do not reset. Recovery is mathematically possible.
- If you are between 1% and 2% from the Drawdown: critical zone. Reduce size to 25% of what was calculated. Trade only 2 trades/day. Focus on not losing, not on winning.
- If you are less than 0.5% from the Drawdown: reset. There is no "I will recover." The psychological pressure already breaks the process. A reset costs $80–$150, that's the price of starting over with a clear head.
- If you hit the Drawdown: the account is over. Breathe. Look at the trades. Identify the pattern that broke. Start again after 1 week, not the next day. Most traders reset in the heat of the moment, and reset again within 3 days.
A sign that the problem is technical, not luck: if in 3 resets you keep breaking at the same phase (e.g., always on day 5 or 6, always on a high-volatility day), the problem is the system, not the market. Stop resetting, study 2 weeks on demo, come back afterward.
Post-Approval: Funded vs. Evaluation
Passing the challenge is 50% of the work. The other half begins when the account becomes funded (Performance Account or PA). The rules change, in most firms, they become stricter, not looser. Many traders who pass the challenge break in the first week of funded by not adjusting their behavior.
What changes:
- The Trailing Drawdown freezes at a fixed value in most firms once you reach a certain profit (e.g., $2,600 on Apex 50K). Before that, it locks at breakeven plus X dollars
- The safety net rule appears: you need to have X dollars above the initial balance to be able to withdraw (Apex 50K: $2,600)
- The minimum payout window emerges, in Apex, 5 days with positive profit before the first withdrawal. In FTMO, 14 calendar days
- The Consistency Rule remains active and directly affects the amount you can withdraw, not just access
The goal of the funded account in the first 30 days is just one: take the first payout. Doing this closes the financial cycle (recovers the challenge fee, activation fee, and exits with profit). From then on, each cycle is pure margin. The How to Withdraw Your Profits guide covers the complete payout flow.
Comparison: Which Firm Has the Best Pass Rate
Not every firm has the same difficulty. The model (1-step vs. 2-step), the Drawdown (Trailing vs. Static), and the target directly impact the probability of passing. Here is the comparison updated in April 2026.
| Firm | Model | Target | Drawdown | Estimated Pass Rate |
|---|---|---|---|---|
| Apex | 1-step | 6%–8% | Trailing $2,500 | 8%–10% |
| Bulenox | 1-step | 6% | EOD or Static | 10%–13% |
| FTMO | 2-step | 10%+5% | Static 10% | 8%–10% |
| FundingPips | 1 or 2-step | 6%–8% | Static/Trailing | 10%–14% |
| The5%ers | 1 or 2-step | 6%–8% | Static | 9%–12% |
See the complete list of firms with active coupons to compare prices and rules before deciding.
Frequently Asked Questions
I passed phase 1, how long do I have for phase 2?
It depends on the firm. FTMO gives 30 calendar days for phase 1 and 60 days for phase 2. FundedNext gives similar periods. Some firms have removed the maximum time ("unlimited time" challenge), but still require the minimum number of trading days.
If I lose all my profit in phase 2, have I failed?
Not necessarily. Phase 2 has a smaller target (usually 5%) and the Drawdown remains relative to the initial balance. You can fluctuate several times within the permitted range. You only fail if you hit the Max Drawdown or the Daily Loss.
Can I trade at night (Asian session)?
Yes, as long as the firm allows it and the asset is liquid. In Futures, ES and NQ have movement in the Asian session but a wider spread. In Forex, pairs like USDJPY, AUDUSD, and EURJPY have normal activity between 22:00 and 06:00 UTC.
Can the firm change the rules during the challenge?
Large firms rarely change rules for those who already have an active account, changes affect new registrations. Small and unstable firms have retroactively changed rules in the past (part of the reason to prefer firms with 24+ months of operation).
Can I pause the challenge?
In most cases, there is no formal pause, but there is also no obligation to trade daily, only the required minimum. You can leave the account without trading for weeks as long as you meet the minimum days at the end.
Can I pass trading only 1 hour a day?
Yes, if that 1 hour is the most liquid window of your market. In Futures (ES/NQ), trading only from the NY open (e.g., 9:30 to 10:30 ET) is enough to hit the target in 15 days with discipline. The problem is that many traders trade 1 hour due to lack of time, not strategy, these are different things.
What is worse: hitting the Daily Loss or Max Drawdown?
Both close the account. In practice, Daily Loss is easier to hit on volatile days with excessive size. Max Drawdown is easier to hit in sequences of consecutive bad days. Protecting yourself from both is the same exercise: small size, daily loss limit, close when hit.
What is the next thing I should read?
If you understood the process and are going to start, read Position Sizing in Prop Firms to deepen your contract calculation. If you want to understand the mechanics of Drawdown first, go to Drawdown Management. If you want the complete path from scratch, start with What is a Prop Firm.
Conclusion: Passing is Technique, Not Luck
Passing a Prop Firm challenge is an exercise in discipline, not extraordinary talent. The math favors those who play slowly: small risk per trade, respected daily limit, suitability for the right market, replicable routine. The 10% who pass are not smarter, they are more boring. They trade less, risk less, accept that the target takes 15 days instead of 3.
The cost of the first attempt on an Apex 50K with a coupon is $24.90. If you apply the 4 pillars from day 1 and fail, you lost $25 and learned a lesson worth hundreds. If you apply them and pass, you entered a funded account that can pay $2,000 per month on a recurring basis. It's one of the best cost-benefit ratios of practical trading education available in 2026.
The capital mistake is not choosing the wrong firm, it's entering the challenge improvising. Choose a coupon on marketscoupons.com, start with the smallest size of a firm with a track record (Apex, FTMO, Bulenox, or FundingPips), apply the 4 pillars for 15 days. If you pass, great. If you don't pass, you know exactly where you failed and adjust for the next one. The game is about controlled iteration, not about getting it right the first time.
Related Guides
- What is a Prop Firm, Complete guide to the model, payouts, and history
- Drawdown Management, Trailing, Static, EOD, and how each one knocks you down
- Position Sizing in Prop Firms, Mathematical formula to size each trade
- How to Withdraw Your Profits, Payout, taxation, and the path to the first withdrawal
Disclaimer: This guide is educational content. Markets Coupons does not provide financial advice, does not issue investment recommendations, and does not guarantee results in Prop Firms. Trading involves risk. Consult a professional before making any financial decision.